It's difficult to find out some information on the Stepwagon RK5 so I thought I'd document my findings here for future reference and to help others.
Mine came with a Gathers (Panasonic) VXM-135VFNI. It's pretty decent if you're in 2012 still, can read Japanese and live in Japan. The cons of keeping it are:
It's 2-DIN so you can pop another aftermarket one in there. There's some plug and play Android units that can be had from eBay and Aliexpress. There are also replacement fascias on Aliexpress designed to fit some of the android units with larger screens if yours is broken. This is much cheaper that trying to source OEM but they may not fit all aftermarket units.
There are also some ISO adapters from InCarTec. If there's steering wheel controls, you'll need a canbus adapter. InCarTec instructions also refer to a Bluetooth module and required wiring but mine didn't have this and works without. I suspect this would be for models with call buttons on the steering wheel (if they exist). It's probably cheapest to replace the existing rear camera too rather than trying to adapt the existing one. The existing wiring can be used but on mine, some of the colours at either end didn't match so check with a DMM. You're also probably best off adding a stick-on windscreen antenna for DAB and removing the existing ones.
The trim around the radio is likely to be very brittle. I'd say it's impossible to get off without cracking it somewhere.
I haven't figured out every wire but this should help a lot.
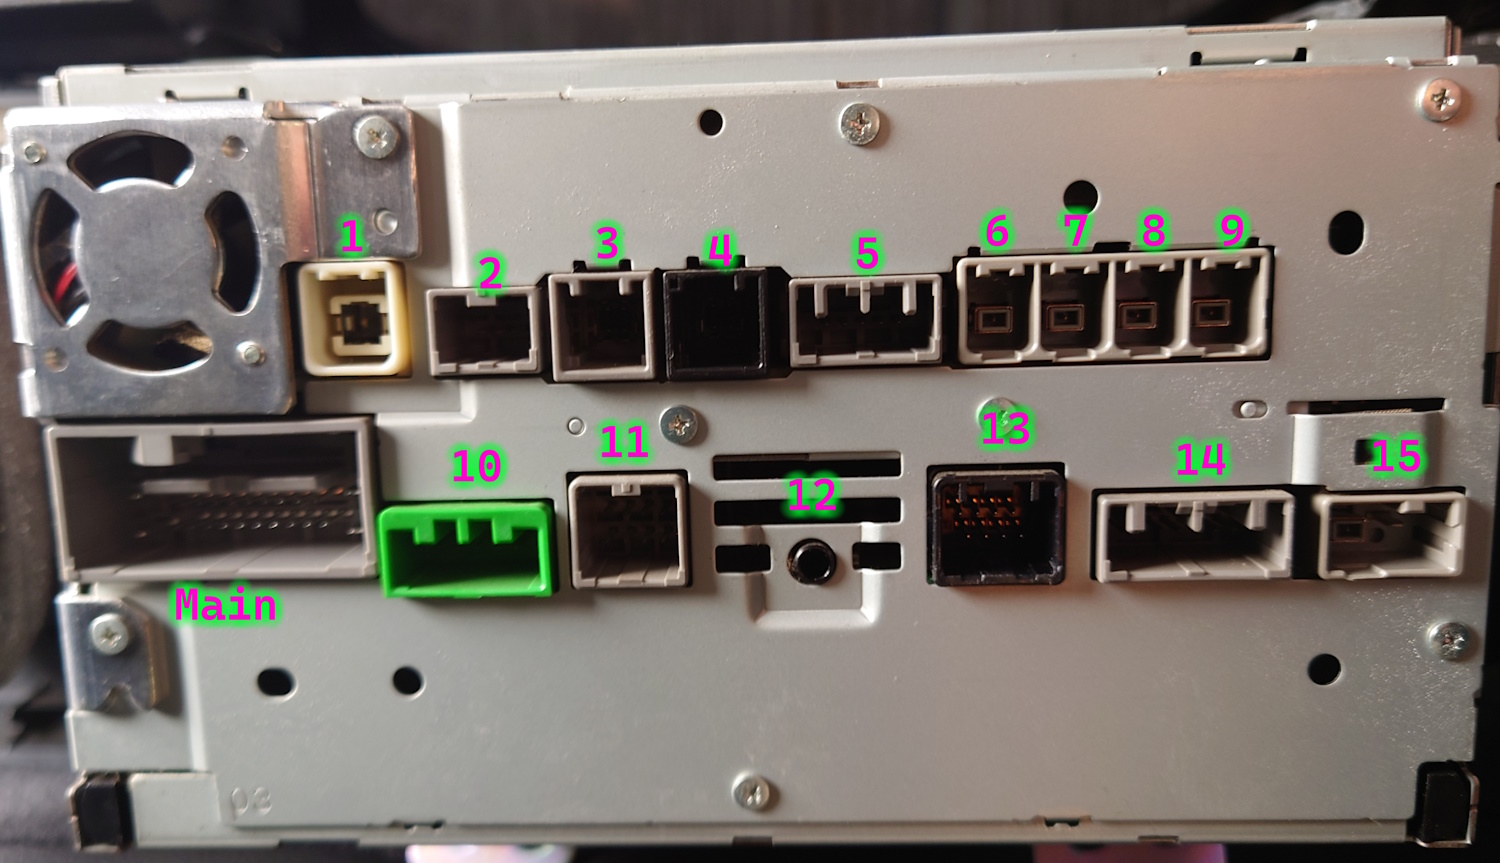
Connectors are labeled from left to right, top to bottom, looking from the back where the wires enter from the loom.
| Pin | Colour | Description | |
|---|---|---|---|
| 1 | - | Unused/unknown | |
| 2 | - | Unused/unknown | |
| 3 | - | Unused/unknown | |
| 4 | - | Unused/unknown | |
| 5 | Pink | Unknown | |
| 6 | Brown | Speaker | |
| 7 | Light green | Speaker | |
| 8 | - | Unused/unknown | |
| 9 | - | Unused/unknown | |
| 10 | Peach | Speaker | |
| 11 | Blue | Speaker | |
| 12 | Brown | Ground | |
| 13 | Light brown | Unknown | |
| 14 | Red | 12v switched | |
| 15 | Green | Unknown (5v) | |
| 16 | Light pink | Unknown | |
| 17 | - | Unused/unknown | |
| 18 | Dark green | Speaker | |
| 19 | Red | Speaker | |
| 20 | - | Unused/unknown | |
| 21 | - | Unused/unknown | |
| 22 | Orange | Speaker | |
| 23 | Light brown | Speaker | |
| 24 | Blue (silver stripes) | Permanent 12v |
Reverse
| Pin | Colour | Description | |
|---|---|---|---|
| 1 | - | Unused/unknown | |
| 2 | Red (with silver stripes) | 12v when reverse engaged | |
| 3 | Peach | Ground |
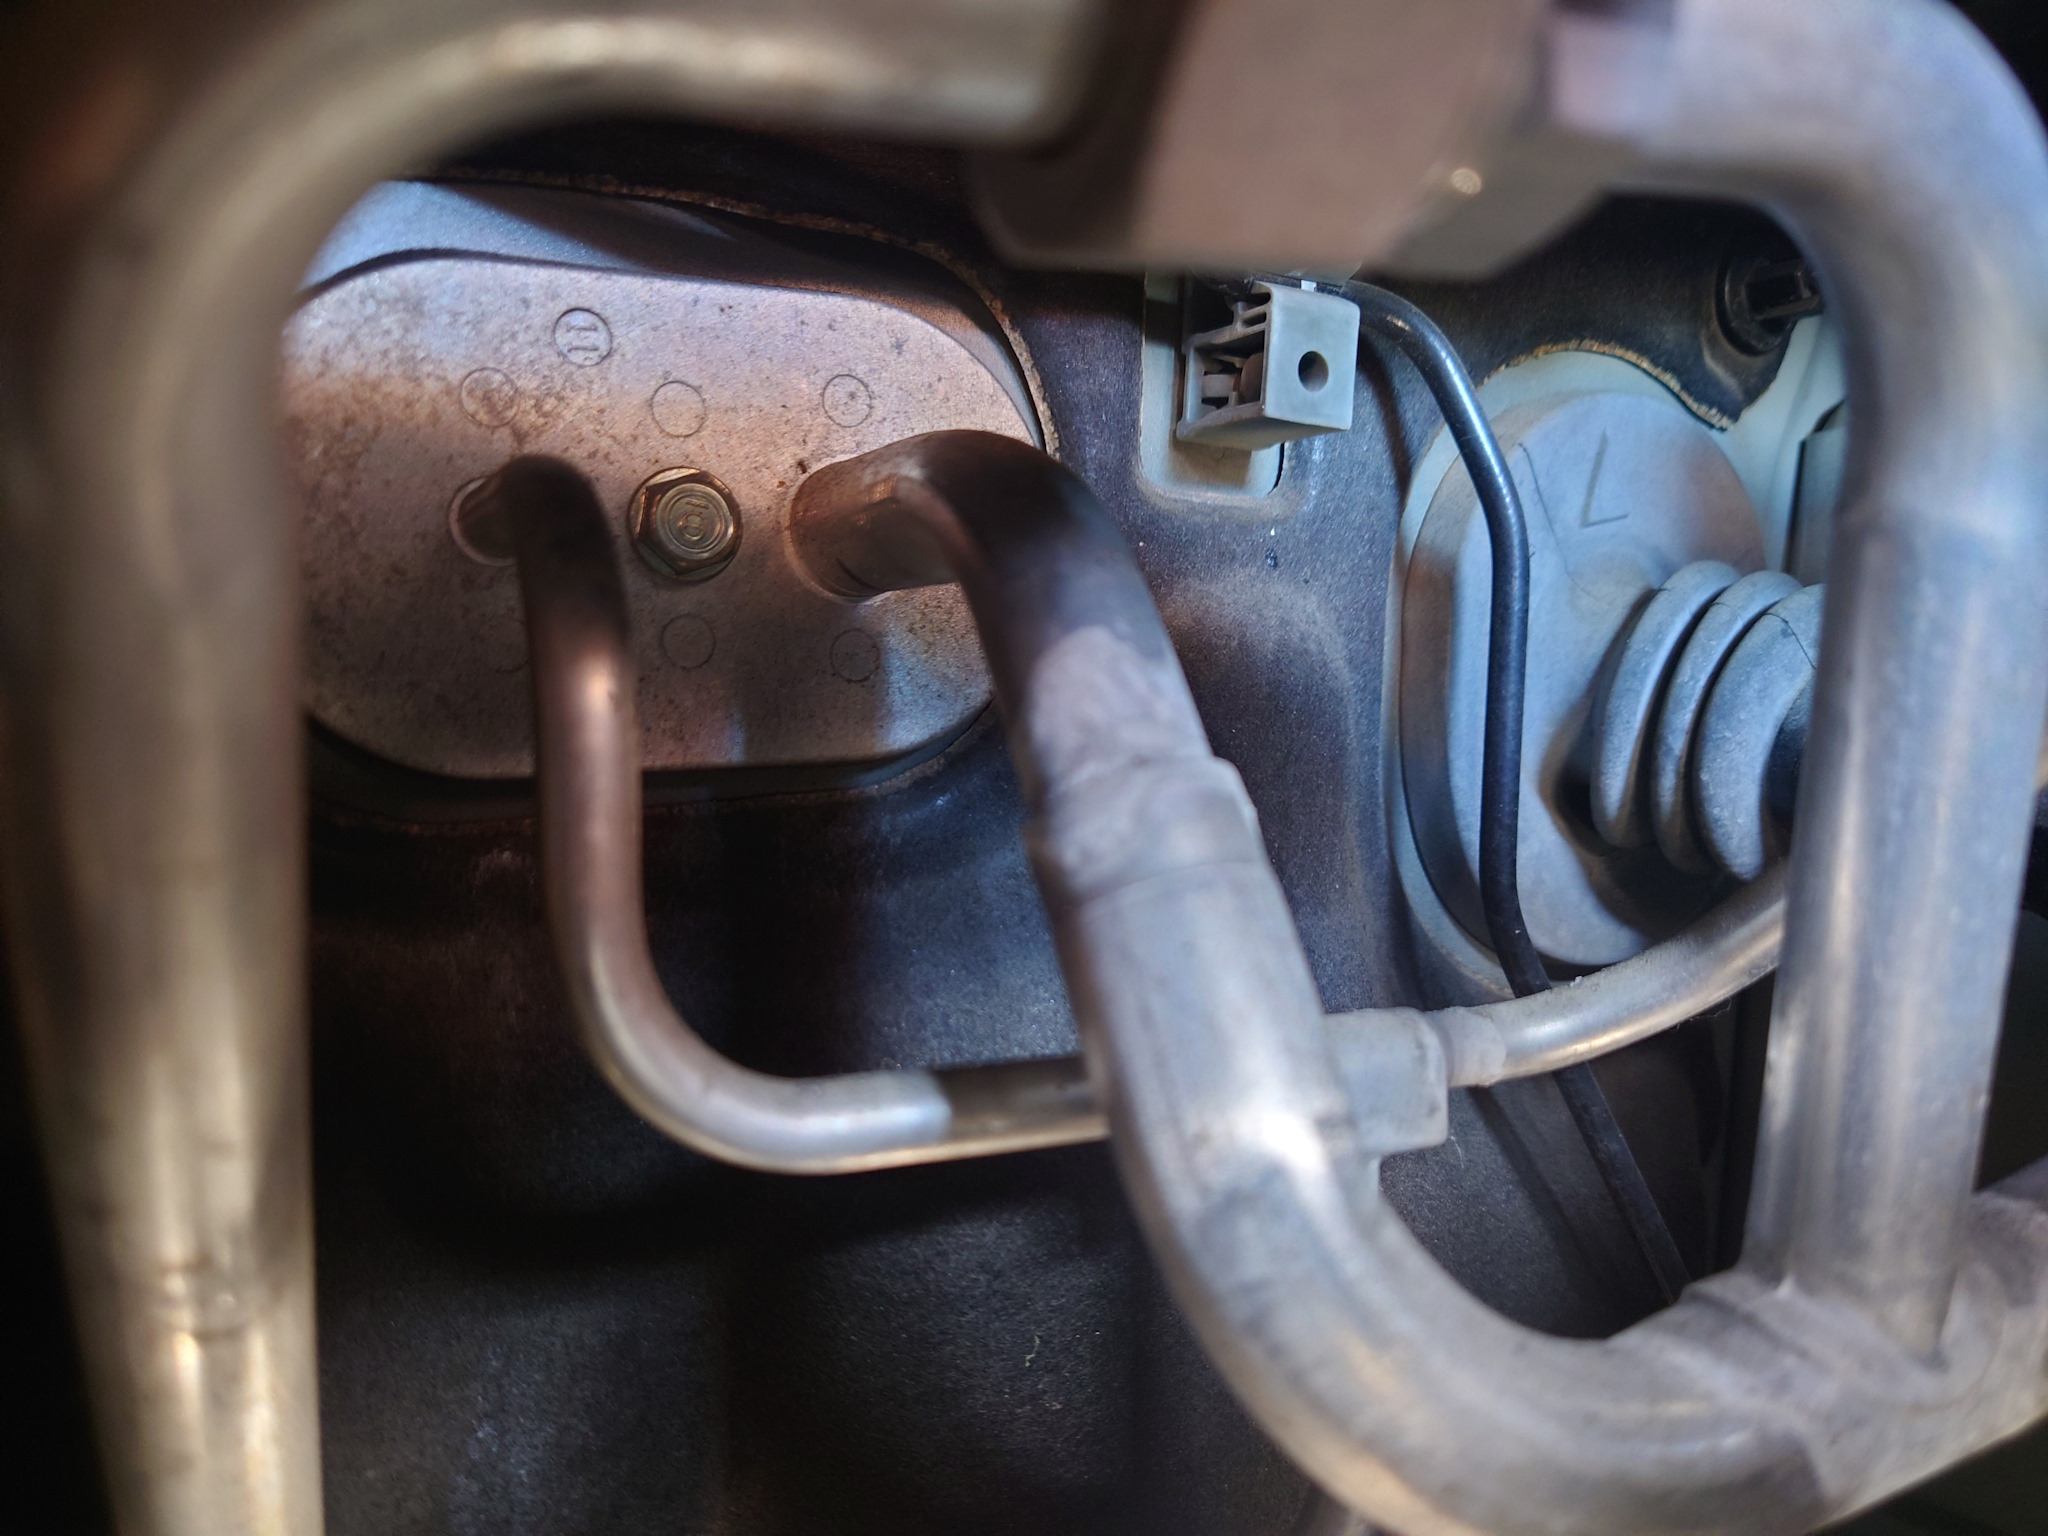
The easiest place I could find was behind the glovebox between the existing wiring harness and air conditioner in/out. Drilling a hole here may need a 300mm drill bit as there's little space for the drill. Aim for around level with the existing harness (hidden behind the blower) and lower down than the air conditioner pipes. There's a clip in the engine bay holding an air conditioner line that you want to come out below.
Removing the passenger side front and rear kick plates expose the Steppy's wiring harness running to the rear and you can run cable to an amp/subwoofer along there.
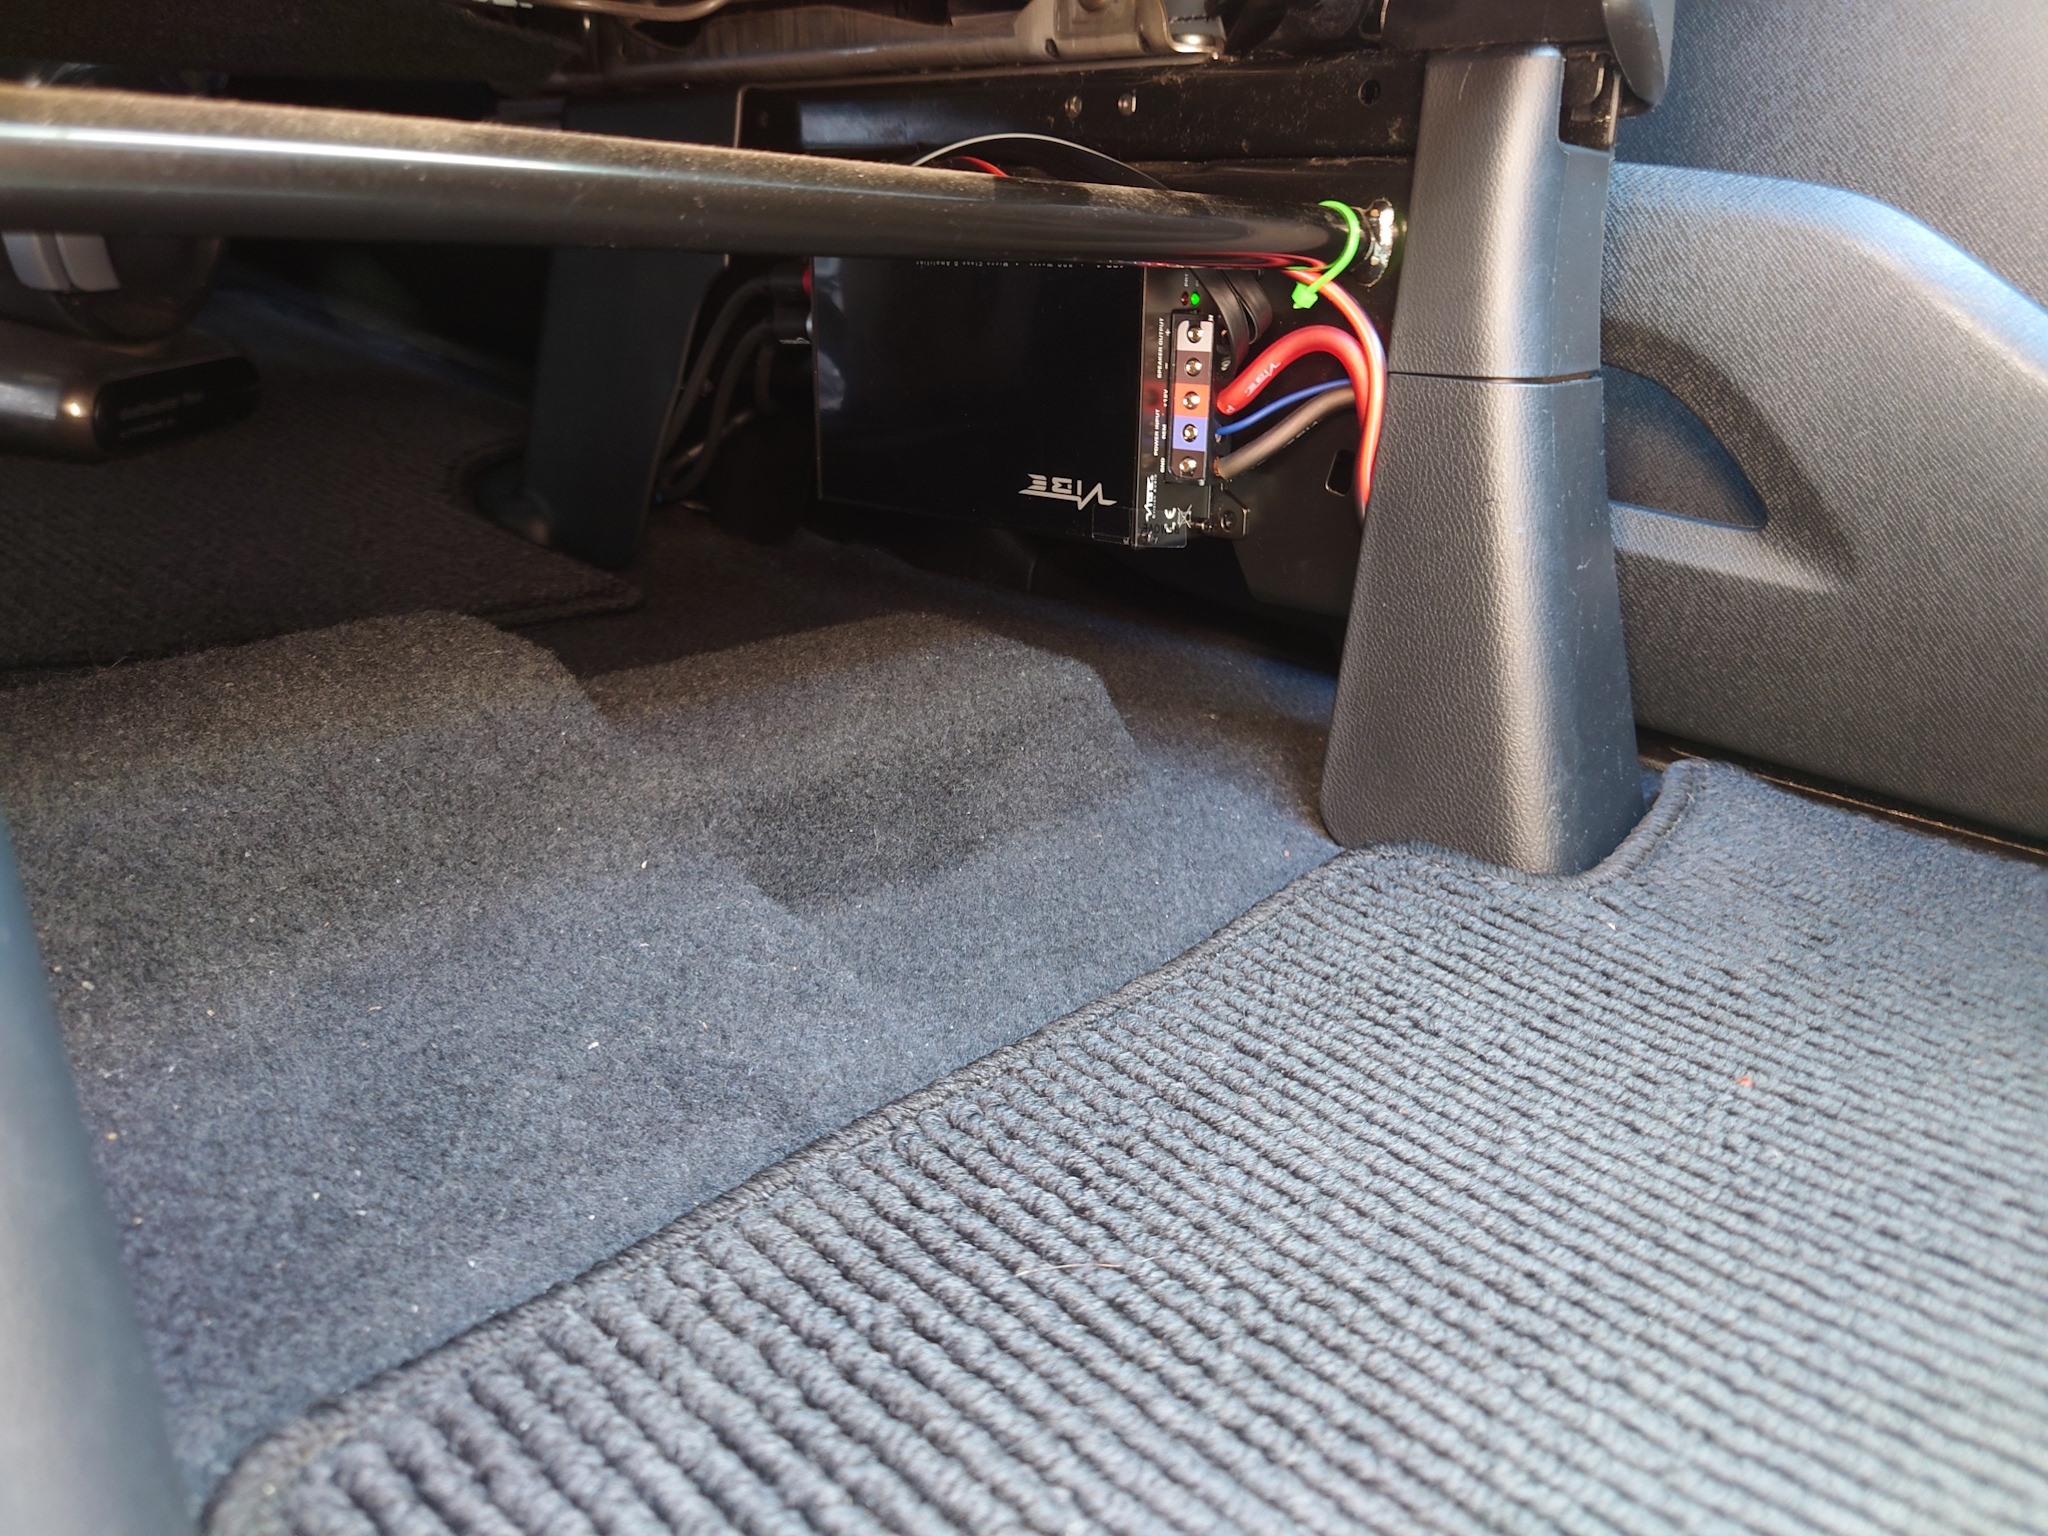
I fitted a small VIBE POWERBOX400.1 amp under the passenger seat bolted to the side. The wiring can come out where the seat attaches to the chassis and be hidden under the trim pieces. I also fitted a Pioneer GM-D1004 which is stuck with double-sided tape right above the glovebox and connects in-line with the ISO harness.
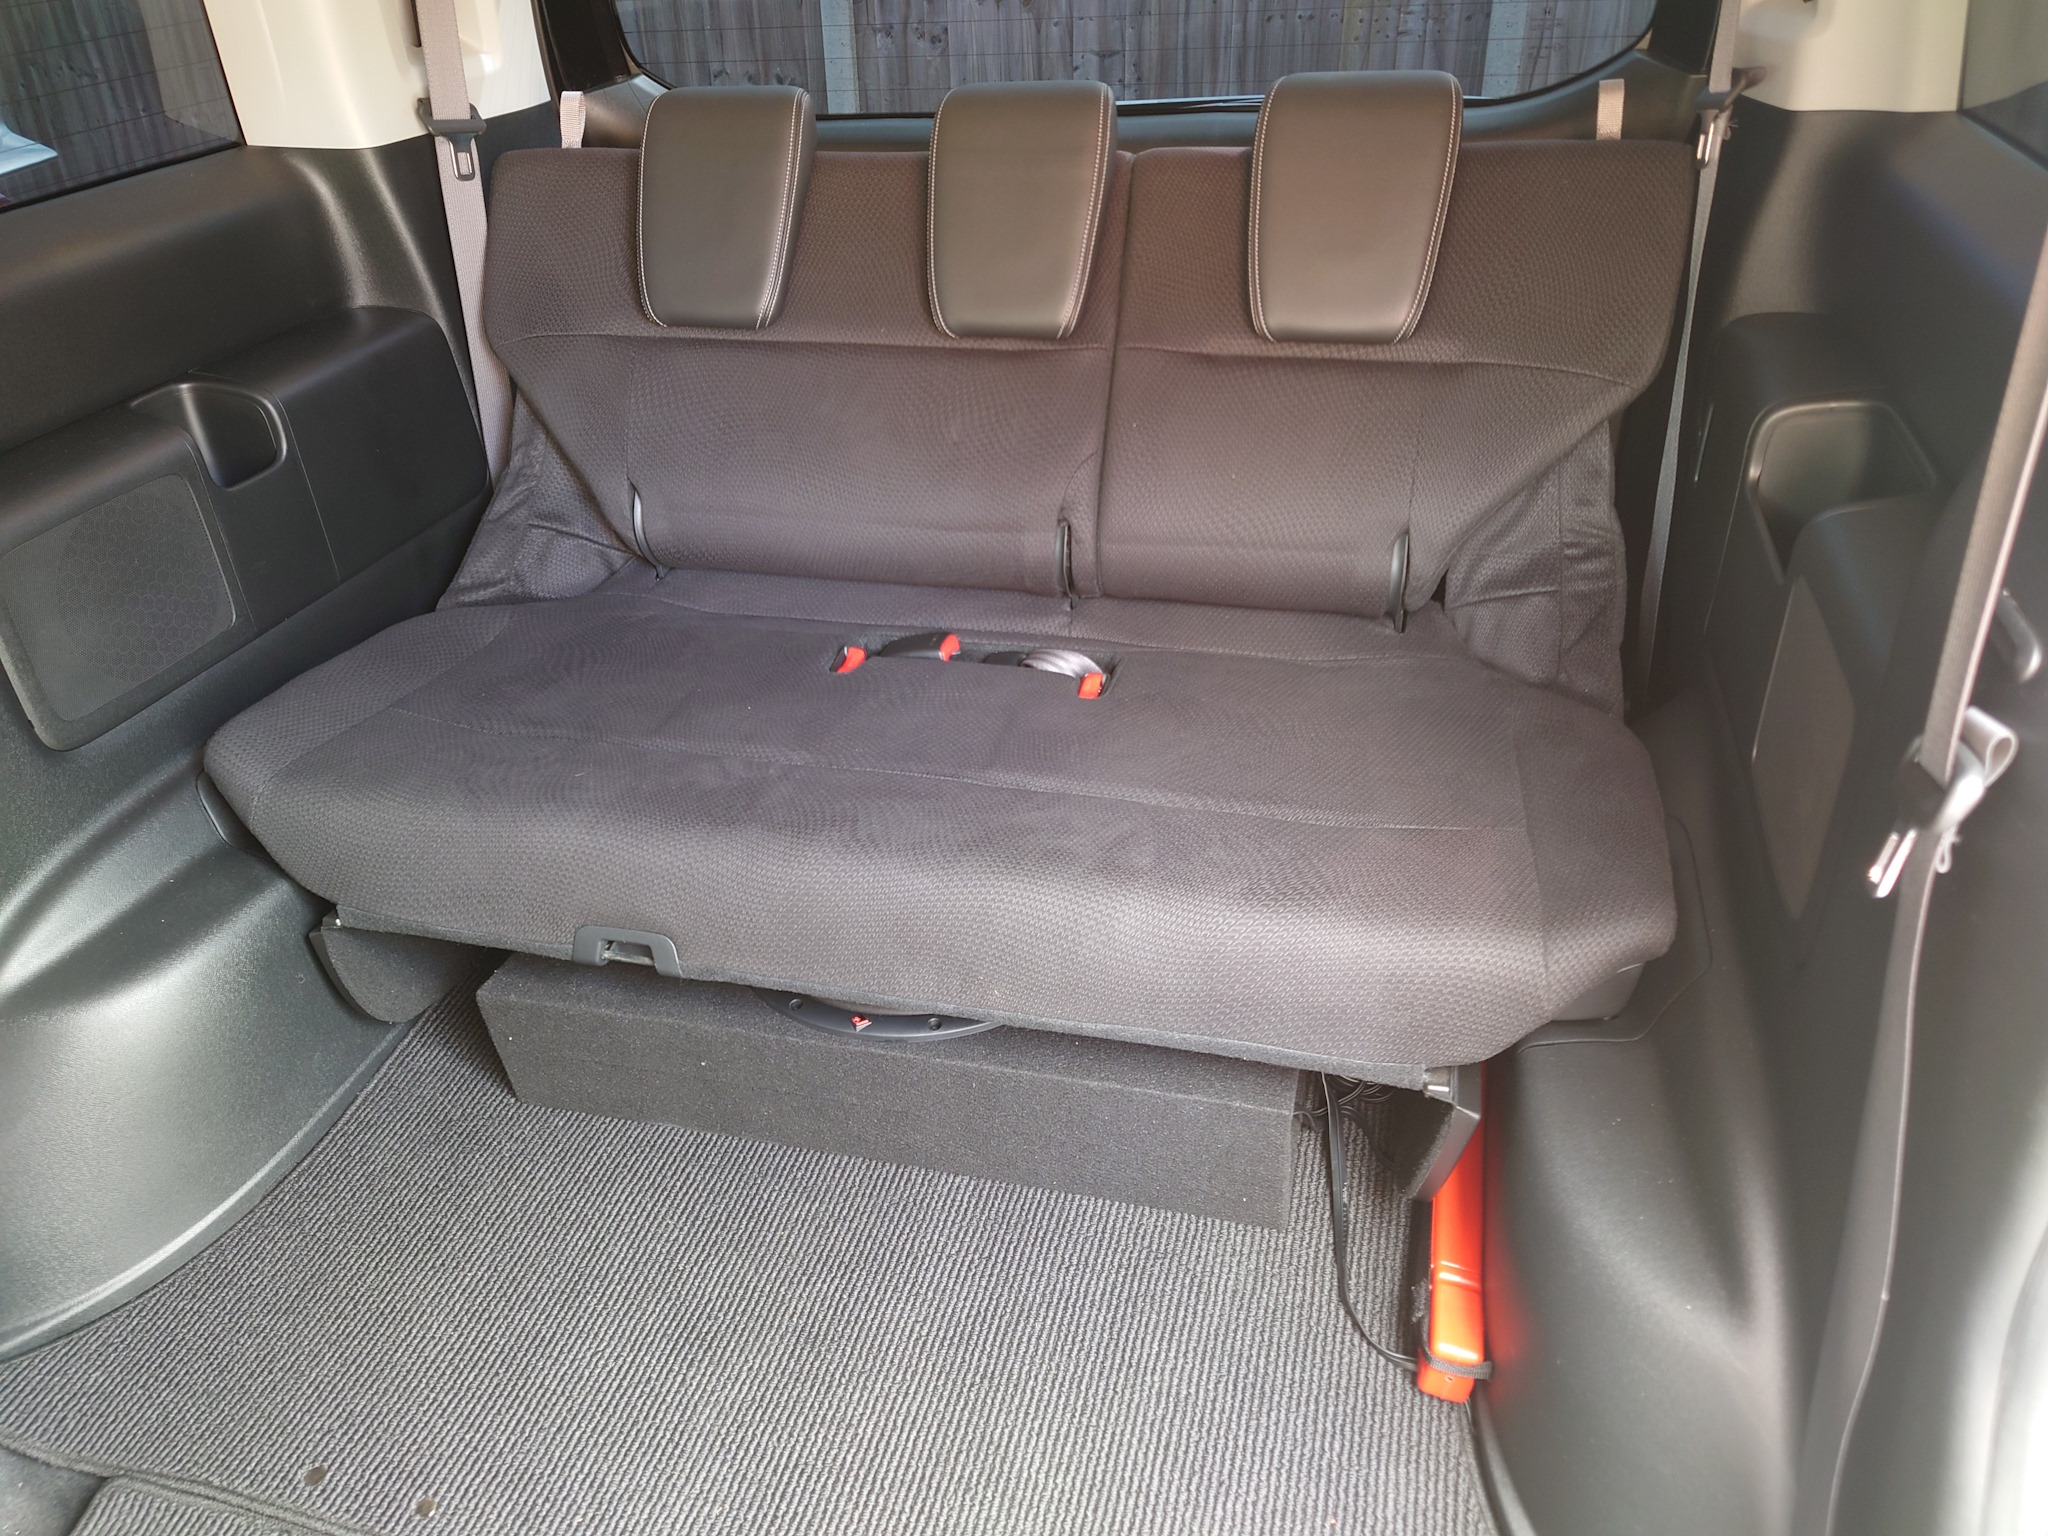
I went with the Rockford Fosgate R2S-1X12 as this will fit underneath the rear seats and can be positioned in such a way that they can still be folded back down into the floor. The subwoofer remains kind of in the way here but you could move it further forwards to gain boot/trunk space when the rear seats aren't in use.